This is the foam I used in its raw form and I had made a very rough plan on how I would construct the boat. It was going to be in three layers of foam.
Hulls on the bottom, main electronics compartmenet in the middle and internal hoppers at the top.
Vey basic design on the right.
Hull Design and Materials
I had already discovered that I only needed a single motor to move the boat through the water at sufficient speed. I had also had problems with the twin motor models I had built before. As the Jet Drive system has a rudder mechanism I decided to mount a single motor in a central hull and have two additional hulls for stability.
I had had bad experiences of making a wooden boat and thought there must be a better way. Boat hulls made commercially are typically vacuum molded but I don't have access to a vacuum former. Another alternative would be glass fibre but I didn't particularly like this idea either. I didn't have a good idea of the shape and size I needed so I looked for a more evolutionary approach to the build.
Eventually I came across some expanded foam insulation lying around in my loft. It turns out that it is Floormate. It's blue and apparemtly made of extruded Styrofoam. It seemed to me to be both very strong and very light. Also very easy to cut and shape.
The sheet was 50mm thick and I though that three layers of this would make the boat. I started with the easiest bit which was the two outer hulls (see left). They're about 25mm wide.
For details on the build CLICK HERE

Build Approach
I decided to take a similar approach to that used when making surf boards. What I mean by this is that the foam would remain an integral part of the structure and provide additional structural strength to the boat. It also means that should I ever put a hole in the hull for whatever reason, it would be very unlikely to take on water.
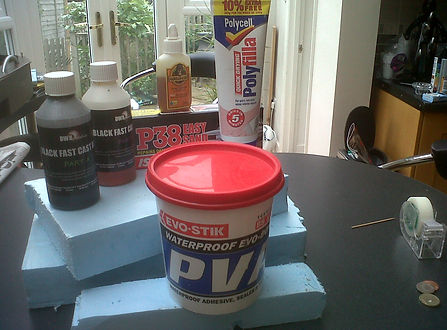
Other Materials
I used a whole bunch of other materials as well (see right). In general terms the process was as follows:
1. Cut Foam to shape.
2. Sand and smooth the foam
3. Fill any dents and scratches with standard polyfilla
4. Sand again
5. Glue foam compoents together as required. I found that Gorilla glue was perfect
6. Apply three coats of waterproof pva to both seal the foam and protect it from adhesives or resin which may melt the foam.
7. Apply 1 or 2 thin layers of P38 car body filler (this helps build a hard shell around the foam).
Note: A stronger alternative at this point would be to use fibre glass tissue/mat and resin but I didn't do this. Overall it's probably a better option.
8. Sand again
9. Apply 3 coats of plastic resin (I used Black Fast Cast available on Ebay). This stuff is designed for making moulds and hardens in about two minutes which makes it very difficult to use. I found that storing the two pots in the fridge extended the time to about 5-7mins and this allowed me to get a pretty good finish. The resin hardens to a similar strength to the plastic used on hard hats so should protect the soft inside of my boat quite well.
10. Finally I gave the boat a spray paint with some standard satin black.